Posts mit dem Label Christmas werden angezeigt. Alle Posts anzeigen

MFT Stamps • October Release Spotlight Day 4

04.11.2023

Hi lovelies,

we've reached the final day of the My Favorite Things October Release Spotlight. Check out the MFT Blog for another round of inspiration from the DT.

For today's project, I combined one of the santas from the Nicest on the List stamp set with the Money Tag Die-namics and the Money Tag Gift Card Pocket Die-namics.

First, I die cut the tag base and gift card pocket from two blue papers from the Colorful Christmas Text Paper Pad. The topper was done in Cornflower Card Stock and I die cut the reinforcer from Red Hot Card Stock. I attached the pocket to the tag with double-sided adhesive and inserted the gift card.

Next, I stamped the santa in Extreme Black Hybrid Ink and colored him with Copic markers. I used the coordinating die to cut out the image. I did some paper piecing for the gift which I stamped onto a piece of black and white striped paper.

The fun sentiment was stamped in VersaMark Ink onto a black cardstock banner and I heat embossed it with white embossing powder. Finally, I popped up santa and the sentiment with thin foam squares.

Please visit the MFT YouTube channel for even more ideas, product details and tutorials.

Thank you so much for stopping by! Have a cozy weekend!
Anja

MFT Stamps • October Release Spotlight Day 3

03.11.2023

Hello friends,

it's Day 3 of the My Favorite Things October Release Spotlight and we're still sharing some holiday goodness.

I made a card with the wonderful SY Christmas Carols stamp set illustrated by Stacey Yacula.

I started off with a white regular sized A2 card base and trimmed down another white cardstock panel to the same size. For the background, I did some stenciling and soft ink blending with Distress Oxides. The snowy hill was done with the Drifts & Hills Stencil. I stamped the snowflakes across the sky using VersaMark Ink and heat embossed them in white.

Next, I stamped the images in Extreme Black Hybrid Ink and colored them with Copics. The sidewalk was stamped and colored directly onto the panel. For the other images, I used the coordinating dies to cut them out.

At the bottom, I stamped the sentiment in VersaMark Ink and heat embossed it with Liquid Platinum embossing powder. Finally, I assembled my little scene by adhering the images with glue.

For even more ideas, product details and tutorials, please visit the MFT YouTube channel.

Thank you so much for stopping by! Enjoy your day!
Anja

MFT Stamps • October Release Spotlight Day 1

01.11.2023

Hello everyone,

the festive My Favorite Things October Release hit the store yesterday. In the next few days we will review the new products and share some inspiration along the way.

For today's card I picked the cute JB Gno Ho Ho stamps – I just adore gnomes! There's also the gorgeous JB Gnome Home Die-namics set which go perfectly with the images.

I started off with a landscape A2 card base and covered the front with one of the beautiful Holiday Plaid Papers. On a white cardstock panel I did an ink blended background with matching Distress Oxides (Kitsch Flamingo, Spun Sugar, Mowed Lawn and Twisted Citron). I stamped the sentiment in VersaFine Onyx Black Ink  in the top right corner.

The gnome house and string lights were die cut from white and colored cardstock. I added a bit of shading with Copics and Lost Shadow Distress Oxide Ink. For some extra shine, I applied Nuvo Crystal Glaze to the light bulbs.

Next, I stamped the gnomes in Extreme Black Hybrid Ink and colored them with Copic markers. I used the coordinating dies to cut out the images which I adhered with foam tape in front of the gnome house.

Please visit the MFT YouTube channel for even more ideas, product details and tutorials.

Thank you so much for stopping by! Have a wonderful day!
Anja

MFT Stamps • October Release Product Preview

30.10.2023

Happy Monday everyone,

get ready for the holiday season with the new festive products from the My Favorite Things October Release. Please hop over to the MFT Blog to see the previews for what will be available tomorrow at 10 am EDT.

On my first card, I combined the sweet Christmas Party Dinos stamp set with brand new patterned papers.

First, I created an A2 landscape card base from white cardstock. I trimmed down the light aqua paper from the Colorful Christmas Text Paper Pad to be slightly smaller. Next, I cut a pretty Holiday Plaid Paper with a stitched rectangle die and adhered the papers onto the card base.

For my little winter scene, I cut out some cardstock with one of the Inside & Out Stitched Oval STAX Die-namics. I did some soft ink blending with Distress Oxides (Kitsch Flamingo, Spun Sugar, Tumbled Glass). The snowy hill was done with the Drifts & Hills Stencil. I stamped the snowflakes in Kitsch Flamingo Distress Oxide Ink and the sentiment in VersaFine Onyx Black Ink.

I stamped the images in Extreme Black Hybrid Ink and colored them with Copic markers. I used the coordinating dies to cut everything out and assembled the scene.

Make sure to visit the MFT YouTube channel for even more ideas, product details and tutorials.

Thank you so much for stopping by! Please come back again tomorrow!
Anja

MFT Stamps • Gingerbread Greetings Card Kit

10.10.2023

Hello friends,

the gorgeous Gingerbread Greetings Card Kit is now available for purchase. The price for this coordinated collection of products is 30% off the cost of buying the elements separately.

I again combined the Gingerbread House Die-namics with one of the Gingerbread Greetings. This time, I used the cute gingerbread people and sweet treats to created a love themed Christmas card.

I started off with a white A2 top-folding card base. To create the heart shape, I actually cut out a mask with a die from the Box of Chocolates Die-namics set and used the negative for blending on Spun Sugar Distress Oxide Ink.

Next, I die cut all the pieces from colored cardstock, added shading with Distress Oxide Inks and grey Copics. I assembled everything and arranged the treats around the heart to build some kind of frame. I adhered the gingerbread couple in the center of the heart and stamped the sentiment below in Amarena Cherry Premium Dye Ink.

Here's another look at the October Card Kit:

Make sure to visit the MFT YouTube channel for even more ideas, product details and tutorials.

Thank you so much for stopping by! Have a wonderful day!
Anja

MFT Stamps • Gingerbread Greetings Card Kit • Preview

09.10.2023

Hi everyone,

today we're introducing the new Gingerbread Greetings Card Kit that will be available tomorrow at 10 am EDT.

This kit comes with the awesome Gingerbread House Die-namics and the Gingerbread Greetings sentiment stamp set.

Here is the holiday card that I came up with:

First, I cut and scored a card base from white cardstock. I trimmed down another smaller white cardstock panel measuring 4 1/8" x 5 3/8". I masked off the ground and did the fading ink blended background with Distress Oxides (Evergreen Bough and Cracked Pistachio). I switched the mask and blended on Lost Shadow Distress Oxide Ink. I stamped on off the sentiments in VersaFine Onyx Black Ink and set the panel off to dry.

Next, I die cut the parts for the gingerbread house from a patterned paper that is included in the MSTN Sand, Surf, & Sky Paper Pad. I inked the edges with Frayed Burlap Distress Oxide Ink. The scalloped trimmings for the roofs and chimney were cut from white cardstock and I added Nuvo Glimmer Paste to them for some sparkle. The other house parts and sweets were die cut from white (I applied some light shading with Distress Oxides) and colored cardstock (Cotton Candy, Ripe Raspberry, Field Day, Sno Cone and Milk Chocolate).

Finally, I assembled the card by adhering all the die-cuts to the ink blended panel and added a bit of Crystal Stickles to the lollipops.

Here's a peek at the October Card Kit:

For even more ideas, product details and tutorials, please visit the MFT YouTube channel.

Thank you so much for stopping by! See you again tomorrow!
Anja

MFT Stamps • October Jenoblade Release Spotlight

04.10.2023

Hello peeps,

today we're showcasing the Special Jenoblade October Release that went live yesterday. Check out the MFT Blog for another round of inspiration from the DT.

For my holiday card, I picked the JB Extra Long Holiday Wishes which features the cutest giraffes.

First, I created an A2 landscape card base from white cardstock. I masked off the ground and blended on Kitsch Flamingo and Spun Sugar Distress Oxide Ink. I also added splatters of Picked Raspberry ink and white gouache paint. After carefully removing the mask, I stamped the sentiment in VersaFine Onyx Black Ink.

Next, I stamped the images in Extreme Black Hybrid Ink and colored them with Copics. I used the coordinating dies to cut everything out. I adhered the Christmas tree and gifts with liquid glue. The sweet giraffes were popped up with thin foam tape.

Please visit the MFT YouTube channel for even more ideas, product details and tutorials.

Thank you so much for stopping by! Have an awesome day!
Anja

MFT Stamps • Christmas Poinsettias Card Kit • Spotlight

06.09.2023

Hello sweeties,

today I'm sharing another card made with the Christmas Poinsettias Card Kit that has been released yesterday.

In addition to the Card Kit there are also complementary add-ons available. On my card, I used the Pressed Poinsettias stamp set and created a background.

First, I created an A2 top folding card from Red Hot Card Stock. On a white cardstock panel, I randomly stamped the blooms, leaves and berry stems using Distress Oxide Inks. For a more modern and non-traditional look, I added Aqua and Peach to the color scheme. The centers of the poinsettias were heat embossed in white. I trimmed down the background to be slightly smaller than the card base.

One of the Christmas Wishes greetings was stamped in VersaMark Ink onto a piece of red cardstock. I heat embossed it with white embossing powder and cut it out with the coordinating die. Finally, I popped it up with thin foam strips.

Here's another look at the September Card Kit:

Please visit the MFT YouTube channel for even more ideas, product details and tutorials.

Thank you so much for stopping by! Have a wonderful day!
Anja

MFT Stamps • Christmas Poinsettias Card Kit • Release Day

05.09.2023

Hi peeps,

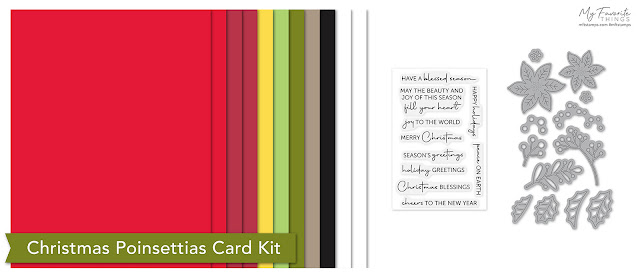
today we're introducing the new Christmas Poinsettias Card Kit that is now available for purchase!

The price for this coordinated collection of products is 30% off the cost of buying the elements separately.

For today's card, I picked the gorgeous Winter Poinsettias Die-namics. Not only do you get two sizes of poinsettias but there are also a couple of leaves and berry stems included.

I started off with a white A2 card base and did some ink blending in the background with Salvaged Patina and Tumbled Glass Distress Oxide Ink. For a bit of interest, I added Peacock Feathers spatters with a small paint brush.

Next, I die cut the layered blooms, leaves and sprigs from colored cardstock (Red Hot, Amarena Cherry, Lemon Drop, Sour Apple, Field Day, Jalapeño Popper, Tropical Teal, Kraft). I arranged them at the bottom half of the card and adhered everything with liquid glue. The larger poinsettia has been popped up with foam tape.

I stamped one of the Christmas Wishes sentiments in VersaMark Ink onto a piece of white cardstock and heat embossed it in gold. Guess what? There are coordinating dies available – love it! To finish off my card, I embellished it with three gold glitter enamel dots.

Here's a peek at the September Card Kit:

For even more ideas, product details and tutorials, please visit the MFT YouTube channel.

Thank you so much for stopping by! See you again tomorrow!
Anja

MFT Stamps • February Ready, Set, Christmas! Challenge

16.03.2023

Hello everyone,

it's time again for the monthly Ready, Set, Christmas! challenge which takes place over on the MFT Blog.

On my square inspiration card, I used the sweet littlefox from the Freezin' Season stamp set.

First, I started off with a white square card base and trimmed down a Bristol Smooth cardstock panel for the ink blended background. I picked the Distress Oxide Inks Uncharted Mariner, Salvaged Patina and Tumbled Glass for this ombré winter sky. I added white paint spatters to mimic falling snow.

Next, I die cut a snow hill from white cardstock using one of the Sand and Surf Die-namics and applied Tumbled Glass Distress Oxide Ink to the edge. The sentiment is from the Holiday Cheers set and I stampe it in VersaFine Onyx Black Ink.

In addition to the fox, I stamped two gifts from the Pure Innocence Christmas Sweetheart set and colored the images with Copic markers. I cut everything out with the coordinating dies and used foam adhesive to add dimension.

I invite you to join the challenge with any new holiday-themed project for your chance to win a $50 Gift Voucher.

Make sure to check out the MFT YouTube channel for even more ideas, product details and tutorials.

Thank you so much for stopping by! Have an awesome day!
Anja

MFT Stamps • February Ready, Set, Christmas! Challenge

23.02.2023

Hello friends,

there's a new monthly challenge over on the MFT Blog. Ready, Set, Christmas! will help you get your holidays cards done way ahead of time.

So I'm happy to already have created my first Christmas card of the year using one of the Birdie Brown Holiday Penguins.

I paired this cutie with some patterned papers from the MSTN Colorful Christmas Paper Pad. First, I cut and scored a card base from Blue Beyond Card Stock. I trimmed down the text paper and adhered it to the card base. The snowflake paper was cut with an A2 Stitched Circle STAX die to create a little backdrop for the penguin.

Next, I stamped the image, colored it with Copics and fussy cut it out. For a bit of dimension, I adhered the penguin with thin foam squares.

Now I invite you to join the challenge with any new holiday-themed project for your chance to win a $50 Gift Voucher.

Make sure to check out the MFT YouTube channel for even more ideas, product details and tutorials.

Thank you so much for stopping by! Have an incredible day!
Anja


GD Sunny Studio Stamps • Penguin Party

10.12.2022

Hi everyone,

So glad to be back again as a guest designer over on the Sunny Studio Stamps Blog. Today I'm featuring the adorable Penguin Party Stamps.

On my first Christmas card, I used a couple of dies with stitching details and patterned papers from the Joyful Holiday Paper pack. I just love this happy color combo!

I started off with a white card base that is slightly larger than the standard A2 size. I cut out the patterned papers with the stitched rectangle die that is part of the Frilly Frames Quatrefoil Dies set. For the three openings I used the Window Trio Square Die. I did some ink blending in the background with Distress Oxides (Spun Sugar and Kitsch Flamingo). I trimmed the patterned papers, adhered them to the card base and added a pink cardstock strip on top where the papers meet.

Next, I stamped the penguins in Memento Tuxedo Black Ink and colored them with Copic markers. I cut them out with the coordinating dies and put each cutie inside a window opening.

To create a custom greeting I combined sentiments from the Santa Claus Lane and Merry Mice sets. I stamped them in VersaMark Ink onto a piece of green cardstock. I heat embossed it with white embossing powder and used the banner die from the Stitched Rectangle Dies set to cut it out. Finally, I adhered the banner onto the center of the pink cardstock strip.


On my second inspiration card I created a winter scene with a purple night sky. This design would work for a winter birthday card as well, right?

First, I cut and scored an A2 sized card base from white cardstock. For the purple background, I blended the Distress Oxide Inks Milled Lavender, Wilted Violet and Villainous Potion onto a lavender cardstock panel. I let it dry and added white paint splatters with a brush.

Next, I die cut two snow hills from white cardstock using one of the Slimline Nature Borders Dies. I applied Tumbled Glass Distress Oxide Ink to the edges and layered the die cuts on top of each other covering the bottom half of the card.

In addition to the penguins and accessories, I stamped the fir tree, igloo and ice block from the Winter Scenes set in Memento Tuxedo Black Ink. I colored the images with Copics again and used the coordinating dies to cut everything out.

The sentiment from the Inside Greetings Holiday set was stamped in VersaMark Ink onto a dark teal cardstock rectangle and heat embossed in white. I adhered the images and sentiment to finish off the card.

Thank you so much for stopping by! Have a wonderful weekend!
Anja

MFT Stamps • November Card Kit • Countdown Day 2

27.11.2022

Hello friends,

today we're introducing this month's amazing Christmas Cash Kit that will be available on Tuesday, November 29th at 10 am EST.

It's jam-packed with a great mix of unique products to present some cash or gift cards in a creative way. The possibilities to personalize them are endless!

I made this fun project using the Money Card Die-namics, the Christmas Cash and Price Tag stamps as well as one of the included pouches to house the money.

First, I cut the A2-sized rounded rectangle die from white cardstock and patterned paper from the Colorful Christmas Paper Pad. Onto a strip of Blue Beyond Card Stock I stamped one of the smaller sentiments in VersaMark Ink and heat embossed it in white. I used a die (that matches the rounded corners of the card base perfectly) to cut it out and adhered it to the top.

Next, I stamped the large 'Naughty or Nice' sentiment in VersaFine Onyx Black Ink onto a white cardstock panel. I also added the check mark to the second square. I trimmed the panel and used one of the Torn Paper Edges Die-namics at the bottom.

I rolled the money and carefully put it inside the pouch which I adhered with double-sided adhesive tape. For a more finished look, I added a frame around it. I love that you have all the dies in the Money Card Die-namics set included to easily dress up your project. The amount was stamped onto a Sour Apple Card Stock circle which I adhered on top of a Field Day Card Stock sunburst circle. 

Of course, there had to be a santa on my card, too. I used a cute YUZU Holly Jolly Santa image which I colored with Copics. I cut it out with the matching die and popped it up with thin foam squares. Finally, I added a blue die cut star to balance out the design.

Here's a peek at the November Card Kit:

Make sure to check out the MFT YouTube channel for even more ideas, product details and tutorials.

I will see you again tomorrow where we're showing you some fabulous add ons!

Thank you so much for stopping by! Have a wonderful Sunday!
Anja

MFT Stamps • November Release Countdown Day 2

06.11.2022

Hi sweeties,

only 2 more sleeps until the My Favorite Things November Release goes live. Check out today's product reveals and fab DT inspiration over on the MFT Blog.

I created a holiday card in a traditional color combo of red, green, white and kraft. Today's card features the Coffee Mug Die-namics which I paired with the DBD Winter Greenery stamps.

I started off with a white A2 sized card base and cut out a Kraft Card Stock panel with the largest of the A2 Double Stitched Rectangle STAX Die-namics. For a bit of interest, I splattered on white paint with a brush.

Next, I die cut the coffee mug twice from Red Hot Card Stock and did some shading with Amarena Cherry Premium Dye Ink. I embellished the mug with the smallest of the Stackable Snowflakes which I die cut from white cardstock. I also attached a red glitter heart on top of the snowflake's center.

I stamped the greenery and pine cones, colored them with Copic markers and cut everything out with the coordinating dies. I adhered the mug to the center of the card and arranged the greenery around it.

Finally, I stamped the sentiment from the SY Christmas Tree Farm set in VersaMark Ink onto a thin black cardstock strip. I heat embossed it in white and adhered the strip with thin foam squares.

I invite you to visit the MFT YouTube channel for even more ideas, product details and tutorials.

Thank you so much for stopping by! Have a wonderful Sunday!
Anja

MFT Stamps • November Release Countdown Day 5

03.11.2022

Hello friends,

today we are kicking off the My Favorite Things November Release Countdown. Join us in exploring all the cool stuff this month. The new products will be available on Tuesday, November 8th at 10 am EDT.

Winter is coming soon and like every year we're wishing for a white Christmas (which is pretty rare). At least, I can create it on my card ;-) I combined the Snowflake Flurry Background cling stamp with the Stackable Snowflakes Die-namics.

I started off with a white A2 top-folding card base. The beautiful background was stamped in VersaMark Ink onto a Summer Splash Card Stock panel. I heat embossed it with some Judikins Iridescent Sparkle embossing powder. You can't see it much on the photo but it is so pretty in real life! I trimmed it down to be a bit smaller than the card base.

Next, I die cut the large and middle snowflake from Sno Cone and white cardstock. I stacked them on top of each other using thin foam slivers for dimension.

I stamped one of the Mod & Merry sentiments in VersaMark Ink onto a Tropical Teal Card Stock strip and heat embossed it in white. The sentiment strip was popped up with foam tape below the layered snowflake.

To finish off the card, I added a shiny iridescent bauble to the center of the white snowflake.

Make sure to check out the MFT YouTube channel for even more ideas, product details and tutorials.

Thank you so much for stopping by! Wishing you a beautiful day!
Anja


GD Sunny Studio Stamps • Cozy Christmas

29.10.2022

Hi everyone,

I'm so happy to be back again as a guest over on the Sunny Studio Stamps Blog. Today I'm showcasing the wonderful Cozy Christmas Stamps from the latest Holiday Release.

On my first sample, I used the stamps for a non-holiday card and created a sweet little living room scene.

First, I started off with a white A2 card base and die cut the largest of the Stitched Rectangle Dies from light blue cardstock. In the next step, I die cut the stitched scalloped mat from the Mini Mat & Tag 3 Dies set out of white cardstock. I masked off the scallop border as well as the stitching and did some ink blending with Distress Oxide Inks. For the wall background, I blended on Tattered Rose and a little bit of Saltwater Taffy. The floor was done in Pumice Stone. I let it dry completely and stamped one of the Penguin Party sentiments in VersaMark Ink. I heat embossed it with Ranger Platinum Embossing Powder. For a bit of dimension, I popped up the scalloped mat with foam tape.

Next, I stamped the images in Memento Tuxedo Black Ink and colored them with Copic markers. I used the coordinating dies to cut everything out. On the armchair, I did some Paper Piecing with blue gingham paper from the Joyful Holiday Paper Pack. I also created a little rug from a piece of Flirty Flowers patterned paper.

Finally, I assembled the scene by adhering the images and floral rug with liquid glue and adding a red enamel heart next to the heat embossed sentiment.


The second sample had to be a holiday card and I really wanted to use the comfy sofa.

I created a landscape A2 card base from white cardstock and covered the front with a striped Joyful Holiday paper. I cut the largest of the Stitched Oval 2 Dies from white cardstock. I also used it on a piece of woodgrain patterned paper (Subtle Grey Tones Paper Pack) and a thin white cardstock strip. In  the background, I did some faded ink blending with Tumbled Glass and Salvaged Patina Distress Oxide Ink. Then, I adhered the woodgrain floor and white strip to the bottom half of the oval. I stamped the sentiment on top using aqua blue pigment ink.

The images were stamped in Memento Tuxedo Black Ink and colored with Copic markers. I paper pieced the pillows and cut everything out with the coordinating dies.

I adhered the images to finish off the scene and applied some Crystal Stickles to the white parts of the christmas tree decor.

Thank you so much for stopping by! Have a cozy weekend!
Anja

MFT Stamps • Color Challenge 199

27.10.2022

Hello friends,

today starts a new MFT Color Challenge. I invite you to join the bi-weekly challenge with a project for your chance to win a $50 Gift Voucher to the MFT boutique.

I created this CAS holiday card using a couple of supplies from the latest October Release.

These are the colors for the Color Challenge #199:

I started off with a white top-folding A2 card base. I die cut one of the Surprise Stitched Tag Die-namics from Grapesicle Card Stock and added a Cement Gray hole reinforcer to the top. I pulled a striped ribbon through the hole and secured it with a white string bow.

Next, I cut the Merry Christmas Frame Die-namics two times from Sno Cone Card Stock to make it more sturdy. For the inlaid circle, I used the heart patterned paper from the Colorful Christmas Paper Pad.

My focal point is this sweet walrus from the Chill Holiday stamp set. I colored him with Copic markers and used the coordinating die to cut out the image. I adhered him with foam squares and popped up the tag with foam tape as well.

For even more ideas, product details and tutorials, please visit the MFT YouTube channel.

Thank you so much for stopping by! Have an awesome day!
Anja


MFT Stamps • October Card Kit Release Day

25.10.2022

Hi everyone,

the brand new Home for the Holidays Card Kit is now available for purchase! The price for this fabulous collection of coordinated products is 30% off the cost of buying the elements separately.

For today's card, I used the same kit products again which are the Right at Home Die-namics, the Holiday Home Accents Die-namics and a Home for the Holidays sentiment.

First, I started off with a white A2 card base and another white cardstock panel of the same size. I cut out a window with one of the Elegant Stitched STAX Die-namics. The background was done with Tim Holtz Distress Mica Stains (Winter Frost and Shiny Bauble) which I tried for the very first time. They are so easy to use and I love the shimmer! For the look of falling snow, I added lots of tiny paint splatters with a brush.

Next, I cut out a snow hill and inked the edge with Tumbled Glass Distress Oxide Ink. I die cut the house, tree, snow, lamp post and wreath from colored cardstock (Grapesicle, Grape Jelly, Lemon Drop, Field Day, Smooth White, Cement Gray and Gravel Gray). The smoke was cut from vellum and I applied sparkly Crystal Stickles to the snow die-cuts.

For a bit of dimension, I popped up the window panel with foam tape. I assembled the die-cuts and adhered everything with liquid glue and foam squares.

Finally, I stamped the sentiment in VersaMark Ink onto a Gravel Gray Card Stock rectangle and heat embossed it in white. I sticked it to the top left of my card.

Here you can see the full October Card Kit again:

Please visit the MFT YouTube channel for even more ideas, product details and tutorials.

Thank you so much for stopping by! Wishing you a wonderful day!
Anja

MFT Stamps • October Card Kit • Countdown Day 1

24.10.2022

Happy Monday peeps,

today we're introducing this month's Home for the Holidays Card Kit that will be available tomorrow, October 25th at 10 am EDT.

It's another wonderful scene-building kit which comes with the Right at Home Die-namics, the Holiday Home Accents Die-namics, the Home for the Holidays sentiment stamps and a variety of colored cardstock. There's even a cool Pear Blossom Press One Light (2) Pack included.

This is the CAS card I made with a house (in my favorite color) in a little snowy winter scene.

I started off with a white A2 card base and the die cutting of all the bits and pieces. The cardstock colors I used are Smooth White, Sno Cone, Summer Splash, Tropical Teal, Field Day, Amarena Cherry, Cement Gray and Gravel Gray. I added a bit of Copic shading to the glass of the windows and the snow.

Next, I assembled the scene using liquid glue and thin foam squares. I stamped the sentiment in red underneath it to finish off my card.

Here's another peek at the October Card Kit:

Make sure to check the MFT YouTube channel for even more ideas, product details and tutorials.

Thank you so much for stopping by! See you again tomorrow!
Anja

MFT Stamps • Wednesday Sketch Challenge 615

12.10.2022

Hi everyone,

I had so much fun creating with the latest My Favorite Things October Release, so I'm joining this week's Wednesday Sketch Challenge using some of the new goodies.

I simply had to use the super cute YUZU Holly Jolly Santa stamps again. I also love the versatile Surprise Stitched Tag Die-namics and the gorgeous Colorful Christmas Paper Pad

This is what the sketch #615 looks like:


I started off with a white A2 card base and created a dotty background with the First Snowfall Stencil and Tumbled Glass Distress Oxide Ink.

Next, I die cut the stitched tag from the Merry Christmas patterned paper and adhered it with foam tape to the center of the card. I tied a white string bow to the tag and added a white stitched circle to break up the busy pattern. The santa was stamped in Extreme Black Hybrid Ink and I colored him with Copics. Then I stamped three aqua snowflakes and used the coordinating dies to cut out the images. I adhered the snowflakes around the tag and popped up the sante with foam tape. Finally, I added clear adhesive pearls to the center of the snowflakes.

Join the challenge with your project following the sketch for the chance to win a $50 Gift Voucher.

For even more ideas, product details and tutorials, please visit the MFT YouTube channel.

Thank you so much for stopping by! Have a great day!
Anja

 
site design by designer blogs